

Key Takeaways
- Download the official CSV template before adding items.
- Keep column headers unchanged to avoid import failures.
- Fill all required fields like Item Name and Rate.
- Save the file strictly in CSV format before upload.
- Review error messages to fix failed rows quickly.
- Check the item list after import to confirm success.
To bulk import items into Billbooks, go to the “Items” section and click the “Import Items” icon to open the popup. Download the sample CSV, fill in your item details, then upload the completed file by clicking the “Import Items” icon and selecting your CSV.
Here’s a more detailed breakdown:
Bulk Importing Items in Billbooks – Step-by-Step Guide
- Go to the Items Section
- Log in to your Billbooks account.
- Navigate to the “Items” tab from the sidebar navigation.
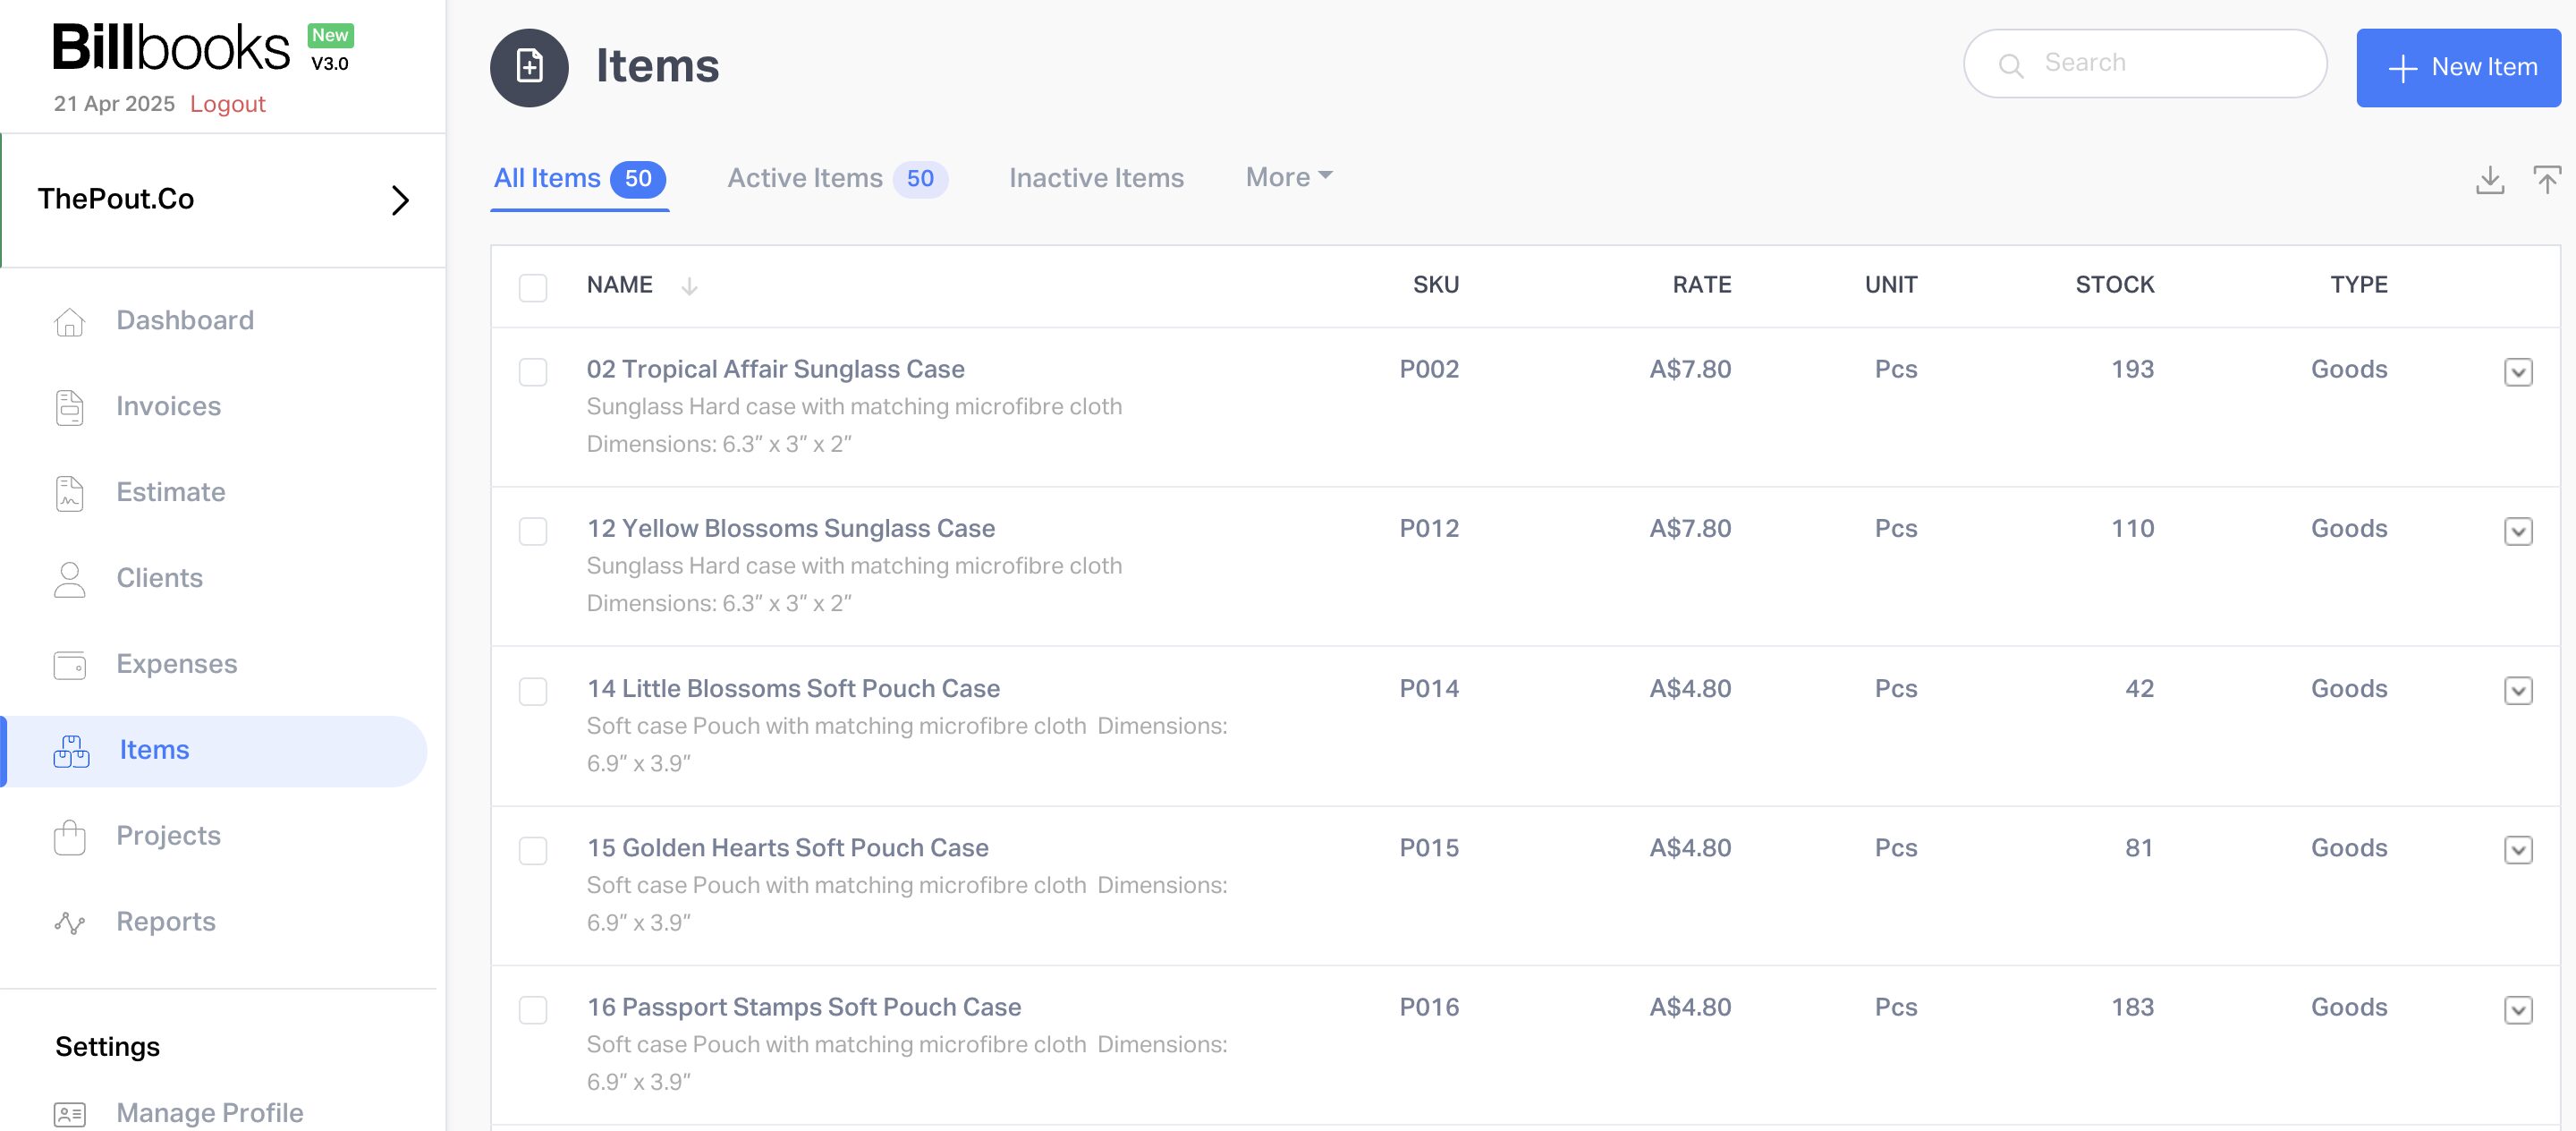
- Download the Sample CSV
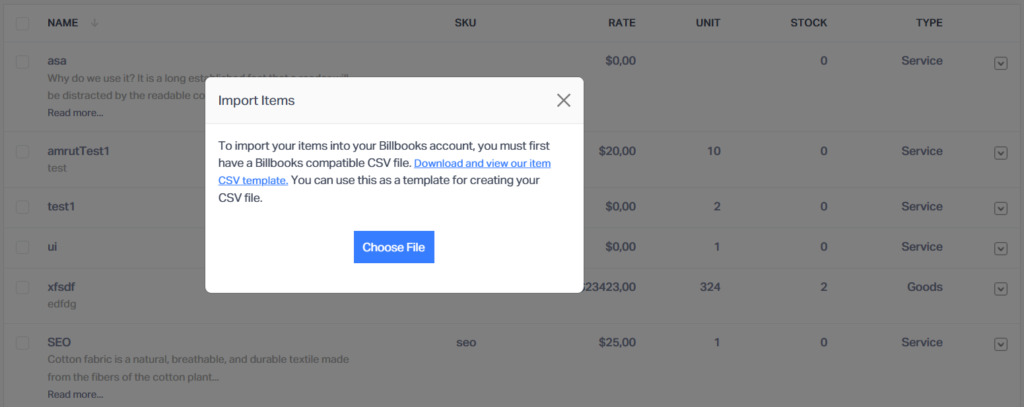
- Click the Import Items icon (at the top right) to open the popup.
- Click “Download and view our item CSV template” to get the correct format template for your items.

- Fill in Your Items
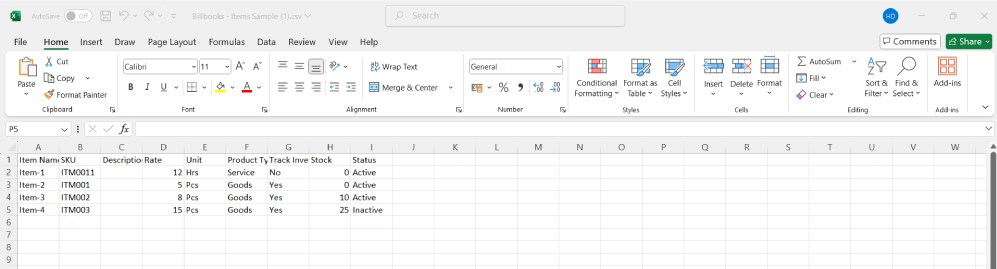
- Open the sample CSV file in Excel, Google Sheets, or any spreadsheet editor.
- Add your item details (e.g., Item Name, Description, Price, Tax, etc.) following the column structure in the sample.
- Save Your CSV File
- After entering your items, save the file in CSV format (Comma Separated Values).
- Import the File
- Return to the Items section in Billbooks.
- Click the import items icon.
- Choose your updated CSV file.
- Once the file is selected, click the “Import Items/Open” button.
- Billbooks will process the file and add the items to your account.
- Verify the Imported Items
- After the import, check the list to ensure all items have been added correctly.
- If any errors occurred, Billbooks will show a message indicating which rows failed and why.

Tips for a Successful Import
- Don’t modify the column headers in the sample CSV.
- Make sure there are no empty mandatory fields (like Item Name or Rate).
- Ensure numerical fields (like Rate or Stock) contain only numbers.
- Avoid special characters or formulas in the cells.
FAQs
How can I bring many items into Billbooks in one upload?
Go to the Items area, click the Import Items button, download the sample CSV, add your item information, and upload the file. Billbooks will then place the items into your account.
What kind of file does Billbooks need for item uploads?
Only CSV files are supported. Save your spreadsheet in Comma Separated Values format before sending it through the system.
Am I allowed to rename the column labels in the template?
No. Leave the column names exactly as they appear or the import may not go through.
What should I do if some entries do not show up after importing?
Look at the error message after the upload to see which rows had problems. Fix those rows in the CSV and upload the file again.
Which fields are required when importing items in bulk?
Item Name and Rate must be completed. Check the template for any other required fields before uploading.
Can I build the CSV file in Excel or Google Sheets first?
Yes. Use either program to enter your data, then export the final version as a CSV before uploading to Billbooks.
Why are amounts or stock figures being refused?
Those columns allow numbers only. Remove formulas, symbols, and special characters before submitting the file again.
