

To create a new client in Billbooks, go to the “Client” section and click the “New Client” button (at top right) to open the popup. Fill in your client details, then click the save button.
Here’s a more detailed breakdown:
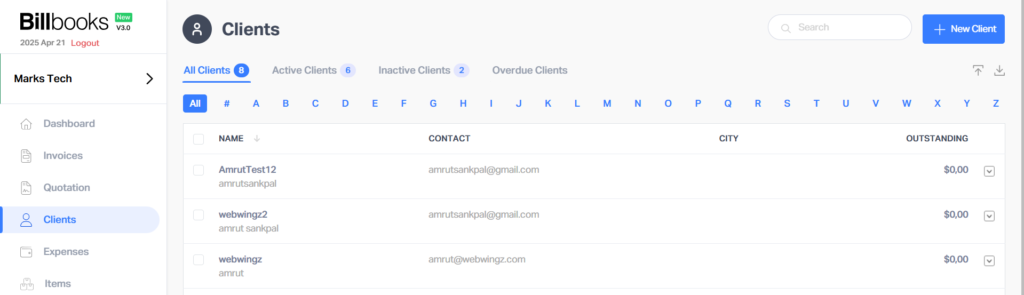
Step 1: Navigate to the Clients Section
- From the dashboard, go to the “Clients” section.
- Click on the “New Client” button located at the top-right corner of the screen.
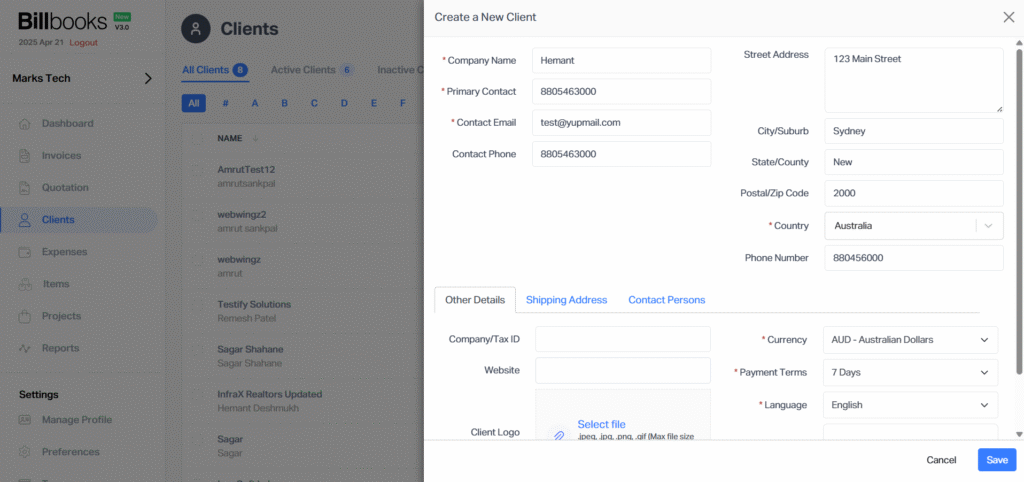
Step 2: Enter Client Information
- A pop-up form will appear.
- Fill in all the required details, including: Company Name, Primary Contact, Contact Email
- Make sure to complete all mandatory fields marked with an asterisk (*) to proceed.
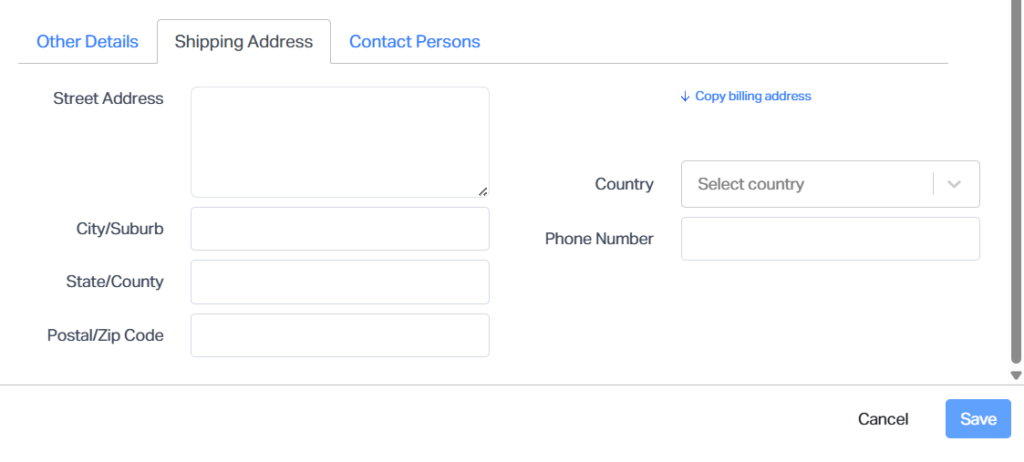
Step 3: Add Shipping Address (Optional)
- If you sell physical goods, click on the “Shipping Address” tab.
- Enter the client’s shipping details to ensure accurate order delivery.
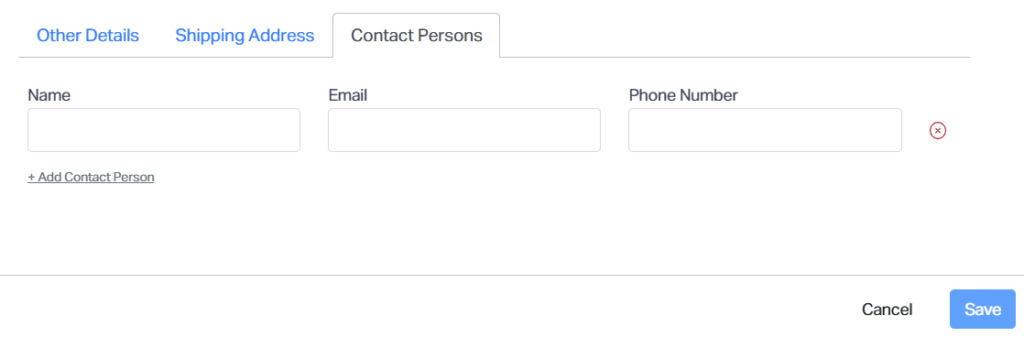
Step 4: Add Additional Contacts (Optional)
- If the client company has multiple points of contact, go to the “Contact Persons” tab.
- Click “Add Contact Person” to include additional team members.
Step 5: Save the Client
- Once all necessary details are filled in, click the “Save” button to create the new client profile.
Tip: Keeping client information complete and up to date helps streamline communication and invoicing.
