

Key Takeaways
- Open the Expenses section to start creating a new record.
- Fill in category, date, and amount before saving.
- Attach receipts to keep expense records complete.
- Enable the recurring option for repeat payments.
- Set frequency and start date for automatic entries.
- Save once to let Billbooks handle future expenses.
Managing your expenses efficiently is key to staying on top of your finances. Billbooks makes it easy to create both one-time and recurring expenses. Here’s a step-by-step guide:
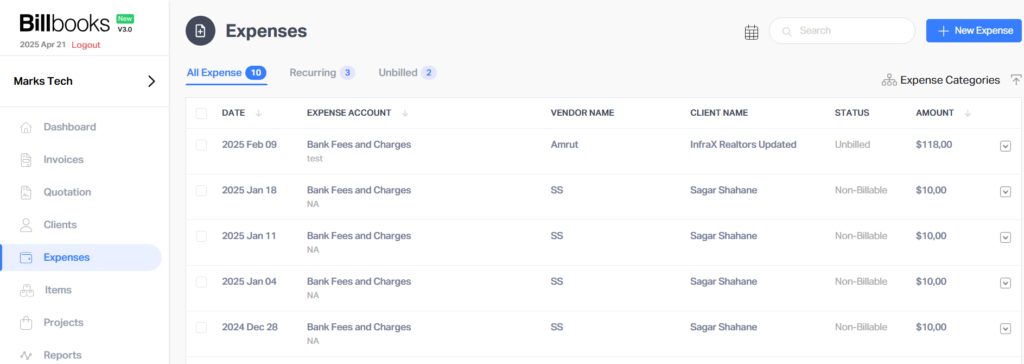
Step 1: Navigate to the Expenses Section
- Log in to your Billbooks account.
- Go to the “Expenses” section from the main menu.
- Click on the “New Expense” button located at the top right corner of the screen.
Step 2: Fill Out Expense Details
In the popup window:
- Enter the expense title and any relevant notes and reference.
- Select the Category of the expense (mandatory).
- Choose the Date of the expense (mandatory).
- Enter the Amount (mandatory).
- (Optional) Upload a receipt or attachment by clicking the upload button.
- (Optional) Select the client from your existing client list.

Step 3: Set the Expense as Recurring (If Applicable)
- Check the box labeled “Recurring”.
- Once selected, additional fields will appear:
- Repeat Every: Choose how often the expense should repeat (e.g., weekly, monthly, yearly).
- Start Date: Set the date when the recurring cycle should begin.
- (Optional) Number of Occurrences, depending on your needs.
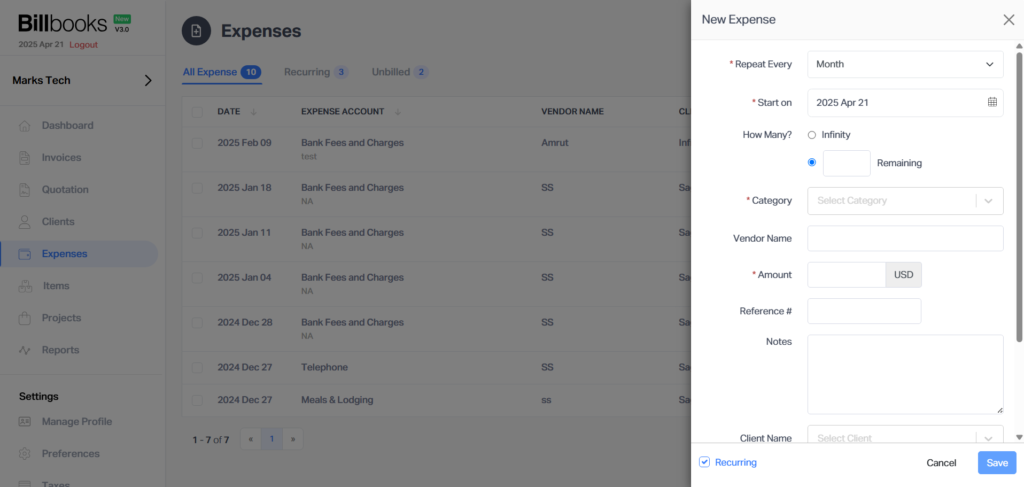
Step 4: Save the Expense
- After completing all the necessary fields, click the “Save” button to add your expense.
You’re Done!
Your expense will now be saved, and if it’s recurring, Billbooks will automatically generate it at the specified interval.
